The OneClickRevelation™ feature of JDXStudio™ tool unlocks and presents relational data in an intuitive graphical format with just one click of a button. Without requiring a single line of programming, this approach enables application developers to quickly and easily view and analyze their data, offering them fresh insights and approaches to harness the power of the data.
OneClickRevelation automates many implicit and explicit steps of compilation, configuration, and invocation of internal components including the JDXDemo program. JDXDemo provides the interactive viewing and analysis of relational data as per the current settings of the database, the mapped Java classes, and the OR-Mapping specification.
OneClickRevelation is invoked by choosing JDXStudio’s menu item Schema | Quick JDXDemo (OneClickRevelation) or the corresponding toolbar button
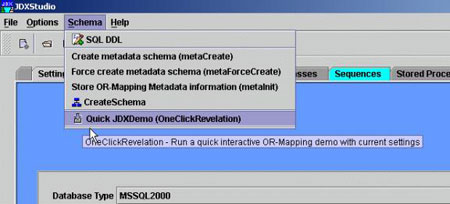
OneClickRevelation menu item
Of course, the schema (database tables) should exist and have some existing data to be viewed with this facility. A successful invocation of OneClickRevelation starts the JDXDemo program to interact with the underlying relational data in an intuitive object-oriented fashion.
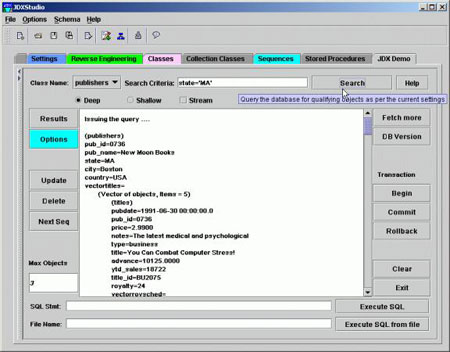
JDXDemo in action
Details
Assuming the existence of the underlying relational data and existence of the required JDBC driver in the CLASSPATH, OneClickRevelation feature can be used in any of the following situations:
TopDown
Here the OR-Mapping specification has been defined; the mapped classes are already compiled and they exist in the CLASSPATH.
BottomUp
Here you start with an existing relational schema but without any classes or mapping specification defined. Do the following:
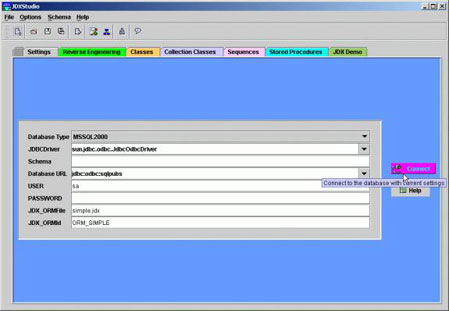
Settings panel
After a successful connection, JDXStudio will automatically expose the Reverse Engineering panel showing existing tables in the left-hand side column named Table Selection List.
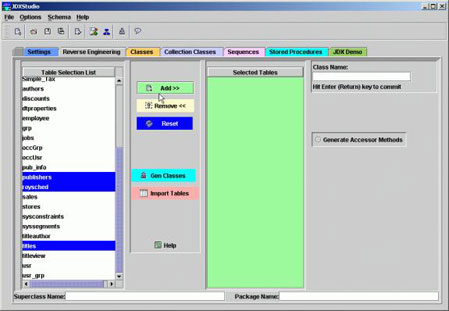
Reverse Engineering panel
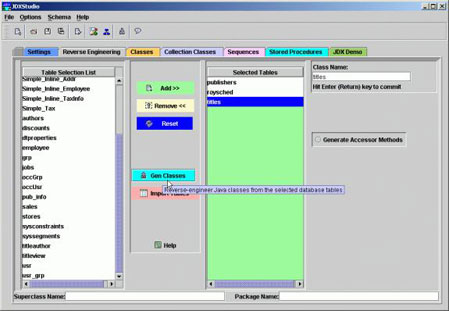
Generating classes in Reverse Engineering panel
After a successful reverse-engineering, JDXStudio will automatically expose the Classes panel showing generated classes and their mapping information.
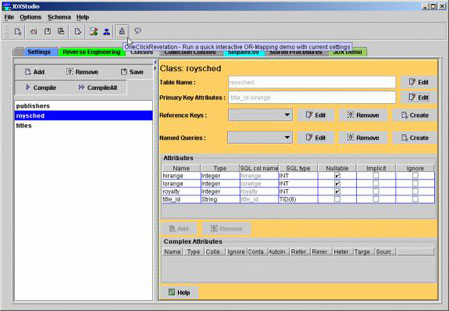
Classes panel
If you make any changes to the default classes or mapping definitions, please save them
Now, when you invoke OneClickRevelation through the menu item Schema | Quick JDXDemo or the corresponding toolbar button , JDXStudio will generate the required configuration file(s) and invoke JDXDemo program. JDXStudio will also implicitly compile the Java source classes in the reverse-engineering mode.

This step will automatically expose JDX Demo panel for you where you can drive the JDXDemo program to interact with the relational data as per the defined OR-Mapping. You can learn about JDXDemo functionality by hitting the Help button.
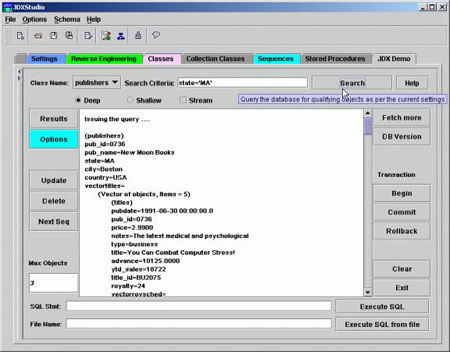
JDXDemo in action
Notes: JDXStudio uses the directory %JX_HOME%\examples\Temp for the above steps and overwrites any previous class or configuration files. If you want to individually save the Java source files, compiled class files, mapping files,and JDXDemo configuration files, use other menu items and buttons in appropriate panels.